Plastic-free plant milk
Posted by Kake on 31 July 2014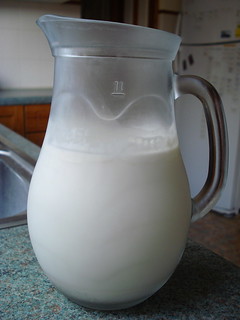
As I normally drink soya milk, which comes in a tetrapak (layered plastic and cardboard), I had to find an alternative for Plastic-Free July.[1] I tried making my own soya milk, my own rice milk, and my own almond milk, but none of them were entirely satisfactory.
A catalogue of failures
Soya milk was a faff, even though I have a machine (passed on to me by a friend) that’s meant to do all the work for you. The milk as it came out of the machine had far too much residue in it, so I had to strain it through a mesh cloth, adding to the time and cleanup. Straining the milk results in a residue called okara, which can be made into granola (among other things), but I found myself ending up with more okara than I could use before I ran out of milk and had to make more. Plus, I couldn’t find a plastic-free source of soya beans.[2] I persisted with my experiments for several weeks — being grateful that I started trying this well before July! — but eventually decided it wasn’t worth it.
I possibly didn’t give rice milk a fair trial — I only tried it once, in my soya milk machine, but although I followed the instructions I ended up with something more like congee than milk.
Almond milk was a lot less faff than soya milk, partly because producing soya milk necessarily involves cooking it, which makes cleanup harder. However, when I put some of my home-made almond milk in my tea I discovered that it doesn’t neutralise the astringency in the same way that soya milk does, which is a deal-breaker for me.
The answer — cashew milk
The answer turned out to be cashew milk. I buy loose cashews from Weigh & Save, soak them, drain and rinse them, blenderise them with fresh water, and then strain the result through a mesh fabric square.
Cashew milk works fine in tea, in porridge, and with cereal. I haven’t tried cooking with it yet, but I see no reason why it wouldn’t work fine in, for example, white sauce.
According to most of the advice I found on the web, cashew milk shouldn’t need to be strained. However, perhaps the people writing the advice have more powerful blenders than me — I definitely found it a bit gritty without straining. The residue is easier to use up than okara since there’s less of it and it’s less “heavy”. I usually just put it in porridge. The residue from 750ml milk is the right amount for two portions of porridge, which is fine by me as I eat porridge at least twice a week, and 750ml milk will also last me a week (both in terms of not running out and in terms of not going off).
How to make cashew milk
You will need a blender. The proportion of cashews to water is up to you, but 75g cashews in 750ml water is a reasonable starting point.
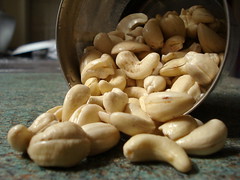
Soak the cashews before you start — this softens them up, which makes them easier to blend. Keep them in the fridge during their soak in order to prolong the life of the resulting milk as far as possible. Once soaked for several hours (or overnight), drain and rinse the cashews and add to a blender with fresh water, then blenderise it all up.
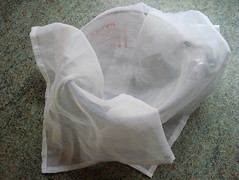
You can buy nut milk bags and fabric squares, but I made my own from a net curtain offcut.[3] I just used a running stitch to hem it, since it doesn’t have to look pretty and I don’t expect it to be under any great degree of strain.
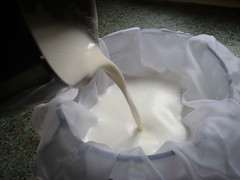
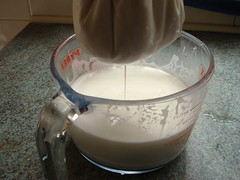
To strain the milk, start by lining a 1-litre measuring jug with your fabric square, then pour the milk into it.
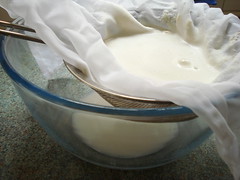
Place a sieve over a bowl ready to receive the “bag” of fabric. Make sure the bowl’s deep enough that there’s room for milk to accumulate without reaching the buttom of the sieve. Gather up the edges of your fabric square into a “bag” and hold it above the jar for a moment until the dripping slows down, then transfer it to the strainer.
Many descriptions of making nut milk tell you to squeeze the bag at this point. I prefer not to do this, since even with washed hands there’s a possibility of bacterial transfer (which isn’t a huge health risk but it does make the milk go off more quickly[4]), and in any case I’d rather let time do the work for me.
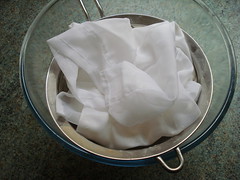
Once the bag is in the strainer, fold the ends of the fabric over the top, and put it in the fridge to drip. After an hour or so, or when the dripping’s stopped, add the milk from the bowl to the jug of milk you made earlier — this is now ready to use.
If you’re in a rush for the milk (e.g. it’s breakfast time and you forgot to make the milk the night before), you can use the milk from the jug while you wait for the rest of it to drip into the bowl.
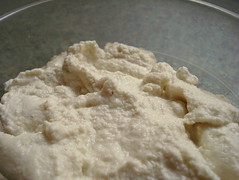
Transfer the leftover cashew pulp to a container with a lid. As noted above, I find it easy to use it all up in porridge — so I haven’t spent much time thinking of other things to do with it! It might be nice stirred into a soup or stew to add a little extra body and richness.
Footnotes and references
- I don’t drink cow’s milk because I don’t like the taste, and my partner’s lactose-intolerant so using plant milk is just simpler all round.
- For my experiments (which took place before Plastic-Free July started!) I used soya beans in a plastic packet from Savemore, 65-67 London Road.
- My offcut cost £2 and came from the bargain bin just inside the entrance of Fabric World, 6–10 Brighton Road, South Croydon, CR2 6AA. I have enough of it left to make a few reusable produce bags too, though I’ve not had time to do that yet.
- In my soya milk experiments, I found that milk made in a process that involved squeezing went sour faster than milk made without squeezing.